
Introduction
All of the videos we watch on our computers and mobiles have gone through an encoding process that converts the original video so that it is viewable on various output formats like mp4,MOV,webm, etc… Today we focus on these encoding techniques through FFmpeg.Here am using nodeJs.
Iam working on a project named “slaxn” is a video sharing website going to be live in couple of days. Coming to the topic video encoding, I used FFmpeg -a complete, cross-platform solution to record, convert and stream audio and video.And a queing system for encoding jobs it is done with kue, Kue is a priority job queue backed by redis, built for node.js.
Prerequisites
- Node js
- FFmpeg
- Redis
- Socket.io
- kue-npm
Setting up the environment
We need an app to configure all in one, I am using express and am not explaining here how to set up app on nodejs thats you already know.As i mentioned in prerequisites we need FFmpeg. For this do the following.
Installing FFmpeg
You guys can download it from their official site www.ffmpeg.org. I am using ffmpeg-4.2.2 version,the latest. It is available for all type platforms.Today iam showing it on linux.You can retrieve the source code through Git by using this command:
git clone https://git.ffmpeg.org/ffmpeg.git ffmpegor else this is the link to download it https://ffmpeg.org/releases/ffmpeg-4.2.2.tar.bz2. Its a tar file you can extract with any kind.
Setting up node.js
I am using node v10.15.2. Any one can download it from there site and is absolutly free https://nodejs.org/en/.For linux platform we have
curl -sL https://deb.nodesource.com/setup_10.x | sudo -E bash -
sudo apt-get install -y nodejs
Open up your terminal and paste this code and hit it.It takes little time to install wait for it.After this you can check the installed version using this command.
node -voutput will be like this v10.16.0.Apart from node npm also gets installed npm-Node package-manager.
Queueing the video
For this we need kue-npm, it gives a fine ui on the job states. The kue consider the video as jobs .We have 4 job states inactive,active,completed and failed,it will be dicussed later.

we need to install the kue, so using node package manager,
npm i kue
npm i kue-ui
ok let’s code this,
export const encodingQueue = async (media: any, jwtToken: string) => {
    const job = queue.create("encoding", {
        media,
        title: media.slug,
        jwtToken,
    }).save((err: any) => {
        if (!err) { console.log("Job Id: ", job.id); }
    });
    job.on("complete", () => {
        console.log("Job completed");
    }).on("error", (err) => {
        console.log("Oops... ", err);
        job.remove(function (err) {
            console.log('removed job #%d', job.id);
        });
        job.failed().error(err);
    }).on("failed", (errorMessage) => {
        console.log("Job failed", errorMessage);
    }).on("progress", (progress, state) => {
        console.log("\r  job #" + job.id + " " + progress + "% complete with data ", state);
        global["io"].emit(`${media.username}-${media.channelName}-${media.slug}`, { progress, state });
    });
};
This function contains queue creation,handlers for job fails,completes,and consoling and emiting progress to view.
export const encodingQueue = async (media: any, jwtToken: string) Here the media is the video file and jwt is my security.
const job = queue.create("encoding", {
media,
title: media.slug,
jwtToken,
}).save
here job is created with name “encoding” and have title as video name. Before this we need a storage for these jobs and here is the use of Redis. Redis is an open source (BSD licensed), in-memory data structure store, used as a database.So let install redis
npm i redisThis is only a package installation,you need to install it in some other means. Here is the link to install redis on ubuntu. https://www.digitalocean.com/community/tutorials/how-to-install-and-secure-redis-on-ubuntu-18-04.
If you want a gui for redis use this Redis Desktop Manager, “https://redisdesktop.com/“, you can see the 16 database and their states.
Ok then we need to set up a connection to redis
var kue = require('kue');            //requiring kue package
var queue = kue.createQueue({        //creating the queue
  prefix: 'queue',
  redis: {
    port: 6379,
    host: '127.0.0.1',
    options: {}
6379 is the port and localhost is the host by default, we can authenticate with a password to enter redis and also we can choose databases among 16.
Processing the batch ‘X’ at a time
We need to pass the job to a encoding function.For this
queue.process("encoding", vars.QUEUE_COUNT, async (job: any, done: any) => {
    try {
        await encodingAndUploading(job, done);
    } catch (error) {
        job.failed().error(error);
    }
queue.process() currently returns a singleton Queue instance.The processing is done here.we pass the callback done to encoding and also the job that is created earlier.And we call the await function encogingAndUploading() for conversion. When there is error occurs we invokes done(err) otherwise done().The done(err) and done() are called from the function encogingAndUploading(),you can see in code.In this you see a QUEUE_COUNT ,it shows the maximum active jobs in the queue.others will go to inactive state,when the active queue frees it get automatically put to active queue.
Encoding…
export const encodingAndUploading = async (job: any, done: CallableFunction) => {
    try {
        const { media } = job.data;
        const { file, slug, channelName, username } = media;
        const fileMD5 = file.md5;
        let duration: any = 0;
        const dir = `streams/${fileMD5}`; //dir to save

        //  Encode to various qualities
        console.log(`Start ${fileMD5} Encoding...`);
        let playlistContent: string = `#EXTM3U\n#EXT-X-VERSION:3\n`;
        const multipleResolution = [{
            output: "240p.m3u8",
            videoBitrate: "145",
            audioBitrate: "64",
            size: "426x240",
        },
        {
            output: "720p.m3u8",
            videoBitrate: "2400",
            audioBitrate: "128",
            size: "1280x720",
        },
        {
            output: "1080p.m3u8",
            videoBitrate: "5000",
            audioBitrate: "192",
            size: "1920x1080",
        }];
const addOption = [
 "-profile:v baseline",   // baseline profile (level
                             3.0) for H264 video codec
 "-level 3.0",
 "-start_number 0",       // start the first .ts segment
                             at index 0
 "-hls_time 4",           // 4 second segment duration
 "-hls_key_info_file enc.keyinfo",
 "-hls_playlist_type vod",
 "-hls_flags periodic_rekey",
 "-hls_list_size 0",       // Maximum number of playlist
                            entries (0 means all
                             entries/infinite)
 "-f hls",                 // HLS format
 "-threads 0",
        ];

        if (!fs.existsSync(dir)) { fs.mkdirSync(dir); }

        const command = FFmpeg({ source: file.tempFilePath })
            .withVideoCodec("libx264")
            .withAudioCodec("aac");
multipleResolution.forEach((data: { output: string, videoBitrate: string, audioBitrate: string, size: string }) => {
        command
         .output(`${dir}/${data.output}`, { end:false })
                .addOption(addOption)
                .withVideoBitrate(data.videoBitrate)
                .withAudioBitrate(data.audioBitrate)
                .withAudioChannels(2)
                .withSize(data.size);
            playlistContent = playlistContent + `#EXT-X-STREAM-INF:BANDWIDTH=${parseInt(data.videoBitrate, 10) * 1024},RESOLUTION=${data.size},CODECS="avc1.42c01e,mp4a.40.2"\n${data.output}\n`;
        });
        command
            .on("codecData", (data: any) => {
                job.progress(0, 100, "ENCODING");
                console.log("Input is " + data.audio + " audio with " + data.video + " video");
            })
            .on("progress", (progress: any) => {
                job.progress(progress.percent, 100, "ENCODING");
                console.log("Encoding Processing: " + progress.percent + "% done");
            })
            .on("error", (err, stdout, stderr) => {
                console.log("Cannot process video: " + err.message, stdout, stderr);
                job.failed().error(err);
            })
            .on("end", async () => {
                console.log("Encoding Process finished successfully");
fs.writeFileSync(`${dir}/playlist.m3u8`,playlistContent, "utf8");

     // Upload the files
await fileUpload(media, job.data.jwtToken, duration, job); // file upload into the DigitalOcean Spaces

// At this point we no longer need the source file, let's delete it.
// Hoping the upload to Wasabi would be done by now. If not we will need to handle this
                fs.unlinkSync(file.tempFilePath);
                done();
            }).run();
    } catch (error) {
        console.log("Error: ", error);
        done(error);
    }
};
In the fuction encodingAndUploading() we passed the job that contains the file to encode and done the callback-function that i mentioned earlier.
const fileMD5 = file.md5;you know MD5 is message digest algorithm and meant for security, here i am using this as identification.MD5 files function similarly to human fingerprints.It can be used to verify identity.We have to encode 100s of file so each one should provide an unique identity, that’s it.
const multipleResolution = [{ output: "240p.m3u8", videoBitrate: "145", audioBitrate: "64", size: "426x240", }, { output: "360p.m3u8", videoBitrate: "365", audioBitrate: "96", size: "640x360", },.......]its an array of formats that i wanted,ie 240p,360p,1080p and we encode each item using ffmpeg.Then you can see a array addoptions=[…] ,these are the extra options for encoding purpose to specify your needs.you will get exact info in ffmpeg doc.I am not explaining it now.
if (!fs.existsSync(dir)) { fs.mkdirSync(dir); }Here is a directory creation for saving the encoded files, later I delete it that I will show you.
const command = FFmpeg({ source: file.tempFilePath })
.withVideoCodec("libx264")
.withAudioCodec("aac");
Here we start, the source is the file the input file.tempFilePath gives the location of file.Then specify the videoCodec for your file. I am using lib*264 because it have the features like including 8×8 and 4×4 adaptive spatial transform, adaptive B-frame placement.And my audio codec is aac, you can check the properties of video after encoding,the audio format will be aac.
multipleResolution.forEach((data: { output: string, videoBitrate: string, audioBitrate: string, size: string }) => {
command
.output(${dir}/${data.output}, { end: false })
.addOption(addOption)
.withVideoBitrate(data.videoBitrate)
.withAudioBitrate(data.audioBitrate)
.withAudioChannels(2)
.withSize(data.size);
playlistContent = playlistContent + #EXT-X-STREAM-INF:BANDWIDTH=${parseInt(data.videoBitrate, 10) * 1024},RESOLUTION=${data.size},CODECS="avc1.42c01e,mp4a.40.2"\n${data.output}\n;
});
Then there is a loop of multipleResolution,the various formats and say how to encode it.The output specifies the folder for saving file, .addoption(addoption) for adding option that i mentioned earlier, with some videobitrate and audiobitrates.and with audiochannel(2),and size.All of the data are saved to a object array that i mentioned earlier, multipleResolution.forEach((data: { output: string, videoBitrate: string, audioBitrate: string, size: string }) .
.
playlistContent = playlistContent + `#EXT-X-STREAM-INF:BANDWIDTH=${parseInt(data.videoBitrate, 10) * 1024},RESOLUTION=${data.size},CODECS=”avc1.42c01e,mp4a.40.2″\n${data.output}\n`;
This is master playlist creation,you can refer here for further info.
#EXTM3U
#EXT-X-VERSION:3
#EXT-X-STREAM-INF:BANDWIDTH=2339363,RESOLUTION=640x360,CODECS="avc1.64001e,mp4a.40.2"
v0/prog_index.m3u8

#EXT-X-STREAM-INF:BANDWIDTH=540863,RESOLUTION=960x540,CODECS="avc1.64001f,mp4a.40.2"
v1/prog_index.m3u8
And this, the original code for creating playlist.
.on("progress", (progress: any) => {
   job.progress(progress.percent, 100, "ENCODING");
  console.log("Encoding Processing: " + progress.percent + "% done");
})
Here we can account the rate of conversion,you can emit the percentage to your app as you wish.
.on("end", async () => {
                console.log("Encoding Process finished successfully");

fs.writeFileSync(`${dir}/playlist.m3u8`,playlistContent,
                                    "utf8");
 // Upload the files
await fileUpload(media,job.data.jwtToken, duration,job); // file upload into the DigitalOcean Spaces


// At this point we no longer need the source file, let's delete it.
// Hoping the upload to Wasabi would be done by now. If not we will need to handle this
   fs.unlinkSync(file.tempFilePath);
   done();
}).run();
Then we have write the playlist content to directory
fs.writeFileSync(${dir}/playlist.m3u8,playlistContent,
"utf8");
utf8 is a 8-bit Unicode Transformation Format : a variable width character encoding. After encoding we have to upload to any storage here i use digital ocean space and there is function to do it fileupload().After this we have delete the source file because it is no longer needed. “fs.unlinkSync(file.tempFilePath);“
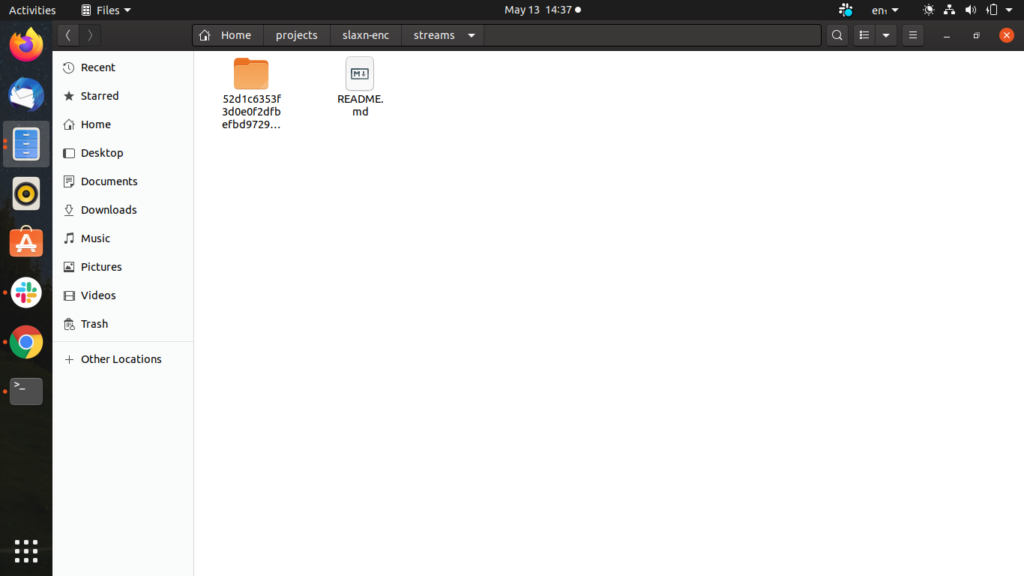

After running the code you will get output like this.Thats it.
Emitting the progress via web sockets
Here we can emit the progress of encoding to the view ,In the kue creation part it is defined,
.on("progress", (progress, state) => {
    console.log("\r job #" + job.id + " " + progress + "% complete with                                                         data ", state);   global["io"].emit(${media.username}-${media.channelName}-${media.slug}, { progress, state });
});
In your app.ts we have some changes
const http = require("http").Server(app);
const io = require("socket.io")(http);
global["io"] = io;
we are using socket.io for emitting corresponding changes to view,you guys can take a look at socket:docs.Then in kue.js we use emit() function here we emit the progress ie,percentage and also the states,I have the states like queing,encoding,completed.you change the states according to it.
Error handling
The handling is already done, yeah the done() do you remember , in kue,say queue processing area i have mentioned about this.If we get an error the done(error)
catch (error) {
     console.log("Error: ", error);
     done(error);
}
is called because it is declared as a callback function, else it pass simply done() shows no error.
}).on("error", (err) => {
console.log("Oops… ", err);
job.remove(function (err) {
console.log('removed job #%d', job.id);
});
job.failed().error(err);
here the done(error) comes then we can remove the job or we can put it into failed state.
Ok friends its going to an end, For any help or suggestion comment below, Thank you.


Leave a Reply