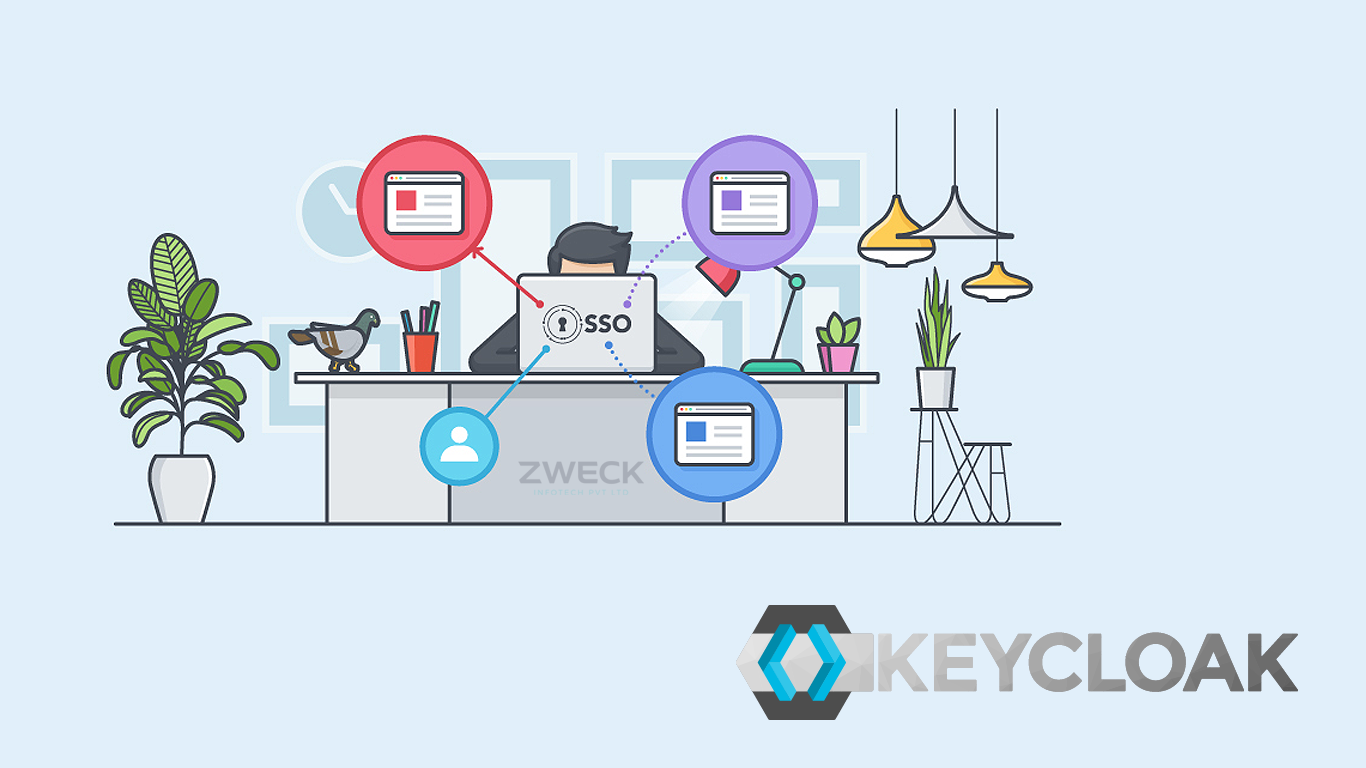
Single sign-on (SSO) is a property of access control of multiple related, yet independent, software systems. What this means is that we can use a single authentication service to allow users to login to other services, without providing a password to the service that is being logged into.
This is different than connecting each of these applications to LDAP, as this requires providing a username and password to every service that you want to login to
Features out of the box
Add authentication to applications and secure services with minimum fuss. No need to deal with storing users or authenticating users. It’s all available out of the box.
- Single-Sign On
- Standard Protocols
- Centralized Management
- Adapters
- LDAP and Active Directory
- Social Login
- Identity Brokering
- High Performance
- Password Policies
- Extensible
- Clustering
Workflow
The basic workflow when authenticating to a service that uses SAML/OIDC from the users perspective is as follows:
- User goes to the web address of a SSO protected service (known as a service provider, or SP).
- The service asks for a cookie that the users browser may have stored, which contains a token. If it finds a valid token in the browser, it logs the user in. If this token does not exist, or is invalid, the service directs the user to the configured Identity Provider (IDP).
- Once the user reaches the IDP, they are presented with a login page.
- The user logins with their provided credentials. The IDP can compare these to locally stored credentials, or against an LDAP or Kerberos backend.
- The user is given a token upon successful login which is stored as a cookie in the browser, and gets automatically redirected back to the service they were initially attempting to access. This token usually contains a username, as well as information regarding what the user has access to, if using a protocol like OIDC that supports authorisation.
- The service requests the token from the browser and if the token is valid, user gets access to the service.
Token validation is done on a secure back channel between the service and Identity Provider, without involving the browser, to increase security.
Setting up on a Self Hosted Server using Docker
There are multiple ways to setup Keycloak. For easiness we will be following the docker method. Before proceeding, please make sure Docker is installed.
# Verify the docker installation
docker --help

Docker version 19.03.13, build 4484c46d9d
Now that docker is installed, . From a terminal start Keycloak with the following command:
docker run -itd --rm -p 8080:8080 --name keycloak -e KEYCLOAK_USER=admin -e KEYCLOAK_PASSWORD=admin -e PROXY_ADDRESS_FORWARDING=true jboss/keycloak:latestdocker ps # Will list out all the running containers. Copy the container ID
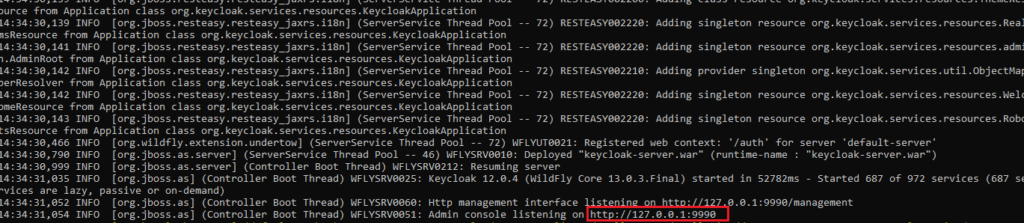
docker logs <Container ID>The logs should show something like this, meaning the server is running on our local port 8080.
Now that we have the instance running in let’s make it production ready by adding an Nginx reverse proxy server and installing Let’s encrypt SSL
Setting up NGINX as reverse proxy server
We need to map the 8080 port to 80 (Http). We will be setting up https (443) in the next step.
sudo nano /etc/nginx/sites-available/defaultand replace the contents with the following code. Note the 8080 port in which our IDP server is running
server {
    server_name idp.yourdomain.com;
    location / {
        # First attempt to serve request as file, then
        # as directory, then fall back to displaying a 404.
        proxy_pass http://127.0.0.1:8080;
        proxy_set_header Host $host;
        proxy_set_header X-Real-IP $remote_addr;
        proxy_set_header X-Forwarded-Proto $scheme;
        proxy_set_header X-Forwarded-For $proxy_add_x_forwarded_for;
    }
}
nginx -t
# Would show something like the below
nginx: the configuration file /etc/nginx/nginx.conf syntax is ok
nginx: configuration file /etc/nginx/nginx.conf test is successfulSecuring using Letsencrypt SSL
The first step to using Let’s Encrypt to obtain an SSL certificate is to install the Certbot software on your server.
Install Certbot and it’s Nginx plugin with apt:
sudo apt install certbot python3-certbot-nginxCertbot provides a variety of ways to obtain SSL certificates through plugins. The Nginx plugin will take care of reconfiguring Nginx and reloading the config whenever necessary. To use this plugin, type the following:
sudo certbot --nginx -d example.comYou will get something like the below on successful completion
IMPORTANT NOTES:
 Congratulations! Your certificate and chain have been saved at:
 /etc/letsencrypt/live/example.com/fullchain.pem
 Your key file has been saved at:
 /etc/letsencrypt/live/example.com/privkey.pem
 Your cert will expire on 2020-08-18. To obtain a new or tweaked
 version of this certificate in the future, simply run certbot again
 with the "certonly" option. To non-interactively renew all of
 your certificates, run "certbot renew"
 If you like Certbot, please consider supporting our work by:
 Donating to ISRG / Let's Encrypt:   https://letsencrypt.org/donate
 Donating to EFF:                    https://eff.org/donate-le
To know more: How To Secure Nginx with Let’s Encrypt on Ubuntu 20.04 | DigitalOcean
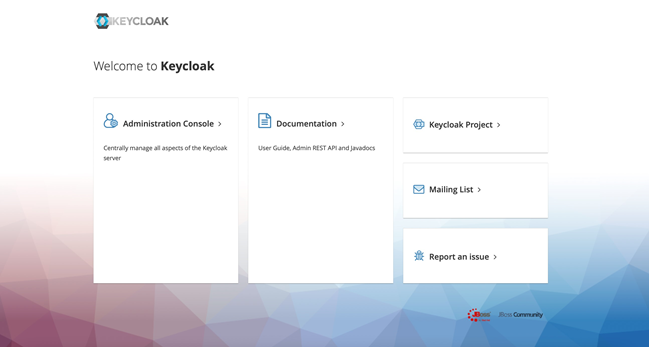
The server should be now up and running at idp.domain.com. Let’s verify by visiting the URL.
Glossary
Realms
A realm manages a set of users, credentials, roles, and groups. A user belongs to and logs into a realm. Realms are isolated from one another and can only manage and authenticate the users that they control.

There are 2 kinds of realms:
Master realm– The default one created when you first started Keycloak. It contains the admin account you generated earlier. You primarily use this realm to create other realms aka tenants.Other realms– These realms are created by the admin in the master realm. In these realms, administrators create users and applications. The applications are owned by the users.
Let’s create a realm named “demo” for testing purposes.

Users
Users are entities that are able to log into your system. They can have attributes associated with themselves like email, username, address, phone number, and birth day. They can be assigned group membership and have specific roles assigned to them.

Roles
Roles identify a type or category of user. Admin, user, manager, and employee are all typical roles that may exist in an organisation. Applications often assign access and permissions to specific roles rather than individual users as dealing with users can be too fine grained and hard to manage.

Groups
Manage group of users. Attributes can be defined for a group. You can map roles to a group as well. Users that become members of a group inherit the attributes and role mappings that group defines.

Groups are hierarchical. A group can have many subgroups, but a group can only have one parent. Subgroups inherit the attributes and role mappings from the parent. This applies to the user as well. So, if you have a parent group and a child group and a user that only belongs to the child group, the user inherits the attributes and role mappings of both the parent and child. In this example, we have a top level Sales group and a child North America subgroup. To add a group, click on the parent you want to add a new child to and click New button. Select the Groups icon in the tree to make a top-level group. Entering in a group name in the Create Group screen and hitting Save will bring you to the individual group management page.
To add a user to a group you need to go all the way back to the user detail page and click on the Groups tab there.

Sessions
When a user logs into a realm, Keycloak maintains a user session for them and remembers each and every client they have visited within the session. There are a lot of administrative functions that realm admins can perform on these user sessions. They can view login stats for the entire realm and dive down into each client to see who is logged in and where. Admins can logout a user or a set of users from the Admin Console. They can revoke tokens and set up all the token and session timeouts there too

We have our IDP setup and running. Now we can create our first Service provider (Client), which is covered in the next blog.
Leave a Reply